Disclaimer: This blog article may contain affiliate links to products on Amazon. As an Amazon Associate, I earn from qualifying purchases. This means that if you click on the provided links and make a purchase, I may earn a commission at no additional cost to you. The inclusion of affiliate links is intended to support the maintenance and growth of this blog. Thank you for your understanding and support.
Wearing pure silk is a luxurious experience. The smooth and soft texture of silk against the skin is a sensation like a gentle caress. As an Autistic person with sensory issues, I seek out silk for this reason! It’s low allergenic qualities plus its breathability makes it a great choice for all seasons, helping to keep you cool in summer and retain warmth in winter. The sheen, the drape, the colours….what’s not to like? Actually, there IS something that I don’t like: silk is expensive!
A quick internet shopping browse will soon make that apparent! One of my favourite silk labels has some lovely tops ranging from $135 to $430, mostly in plain colours. I would love to shop up a storm on that site, but my credit card would hate me.

So what’s a girl on a budget to do? Get creative of course!
I’m going to tell you about three ways you can get a pure luxurious silk top for less. You might already have the items you need in your house, and you don’t need to be particularly good at sewing. In my case, I can’t sew at all!
First, let’s talk a bit about silk. Silk has a rich history dating back to ancient times. Legend has it that the Chinese Empress Xi Ling Shi discovered silk around 2700 BCE when a silkworm cocoon fell into her tea. It’s a good thing she didn’t drink it! Since then, silk production has evolved into a thriving industry.
Silk is primarily produced by silkworms, the larvae of the silk moth Bombyx mori. The process begins with the silkworms spinning cocoon threads, a remarkable feat considering each thread can be up to a kilometer long. Harvesting the silk involves carefully unwinding these threads, which are then woven into the luxurious fabric.
This is a very expensive process and it’s why silk is associated with opulence and wealth, having adorned royalty for centuries.
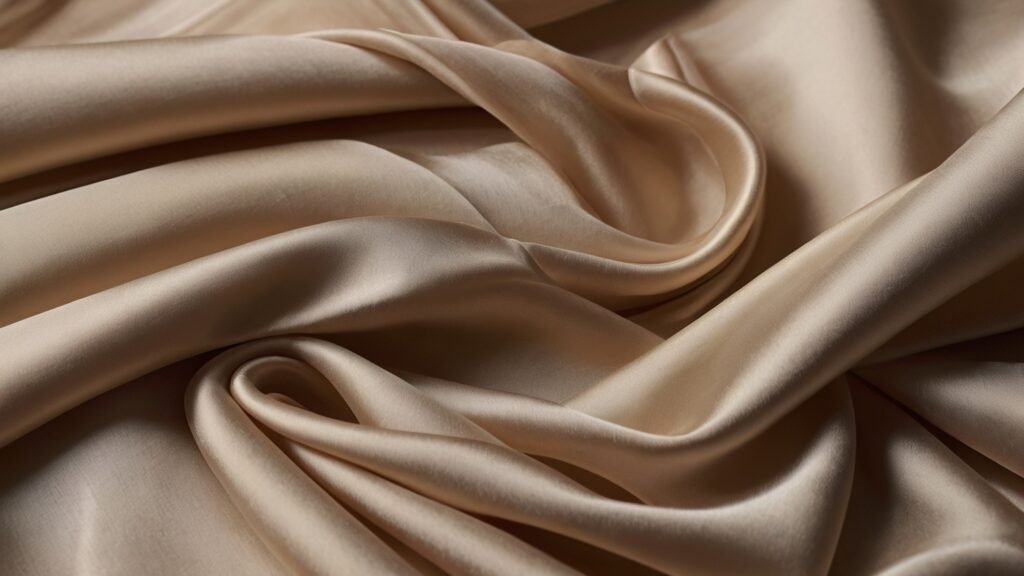
When you buy silk, it’s important to know that there are different grades and quality of silk. For example Mulberry silk which is the most sought after for its high quality. Silk is also graded by its weight, measured in mommes (mm). Momme is a Japanese unit of weight used to express the density of silk fabric. A higher momme count indicates a denser and more substantial fabric. Common momme ranges for silk vary from 12mm for lightweight silk to 30mm for heavier, more opulent options. Most silk items you’ll find in general retail are 19mm. That will be for items like scarves, clothing, and bedding. Then the next quality level is usually 22mm, followed by 25mm and so on. The price increases accordingly.
Now that you understand a bit more about silk, let’s dive into getting you adorned in it!
Method 1
This method is the first one I thought of. I was going through my collection of silk scarves and admiring their beautiful patterns and colours. I was thinking of ways I could wear a scarf and show more of the pattern. Around my shoulders? Draped down the front? Wouldn’t it be good if I could wear it as a top? It was a light bulb moment!
So for this method, all you need is two square silk scarves. They can be two of the same scarf or two completely different scarves, or even one patterned scarf and one in a plain complementary colour.
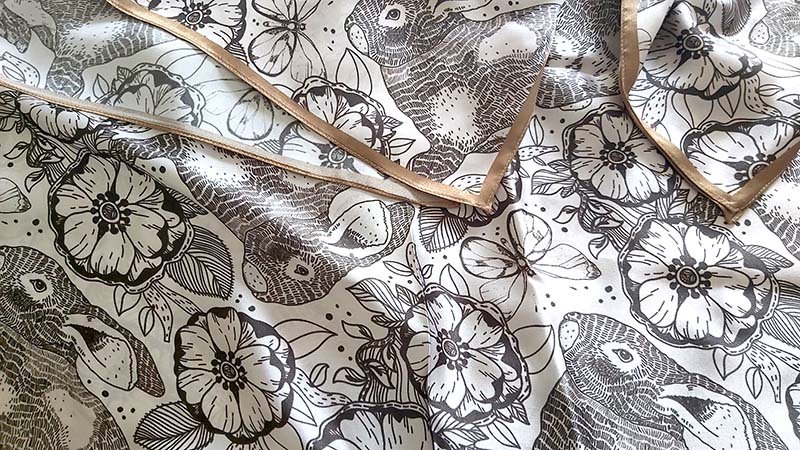
In this example, I’ve used two identical silk scarves with a delightful bunny print. You will need each scarf to measure at least 45cm x 45cm and that should be OK if you’re a size 8 to 12. If you need the top to be larger than that, you will need larger scarves.
You can find suitable scarves for this method here:
21 inch (53 x 53cm) square silk scarves
43 inch (110cm) square silk scarves
The links above are guaranteed by the seller to be silk and have accompanying test reports. Remember to buy TWO scarves.
Note: Be careful when buying silk scarves and make sure they are actually real silk and NOT polyester “silk feeling”. Also, don’t worry if the print is single-sided as only the good sides will be visible.
There are so many colours and patterns to choose from! I think that’s the hardest part.
After that, the process is very simple. You will just be putting them together and sewing four small straight segments.
Remember how I said you wouldn’t need sewing talent? Well I can’t sew. It’s true. I was taught to sew as a child, but could never sit still long enough and found it rather tedious. I’m hyperactive so you can imagine how trying to sit in front of a sewing machine went for me! So, I have a lady called Lyn who does all my sewing for me. She’s a mature lady who lives in a nearby town and she’s been sewing for decades. People drop off their sewing/mending/alterations to her and she does them in her own time for cash. I love to support that kind of industry, and we’ve formed a friendly relationship over the years.
Now, if you might be one of those talented people who CAN sew and if you’re going to do this yourself, just be aware that sewing silk does take a finer needle and a lot of care. It’s best if you’ve had experience with this fabric. If not, then it might be a good idea to practice on a very light polyester first.
That being said, here is the diagram to show you where you’ll need to sew:
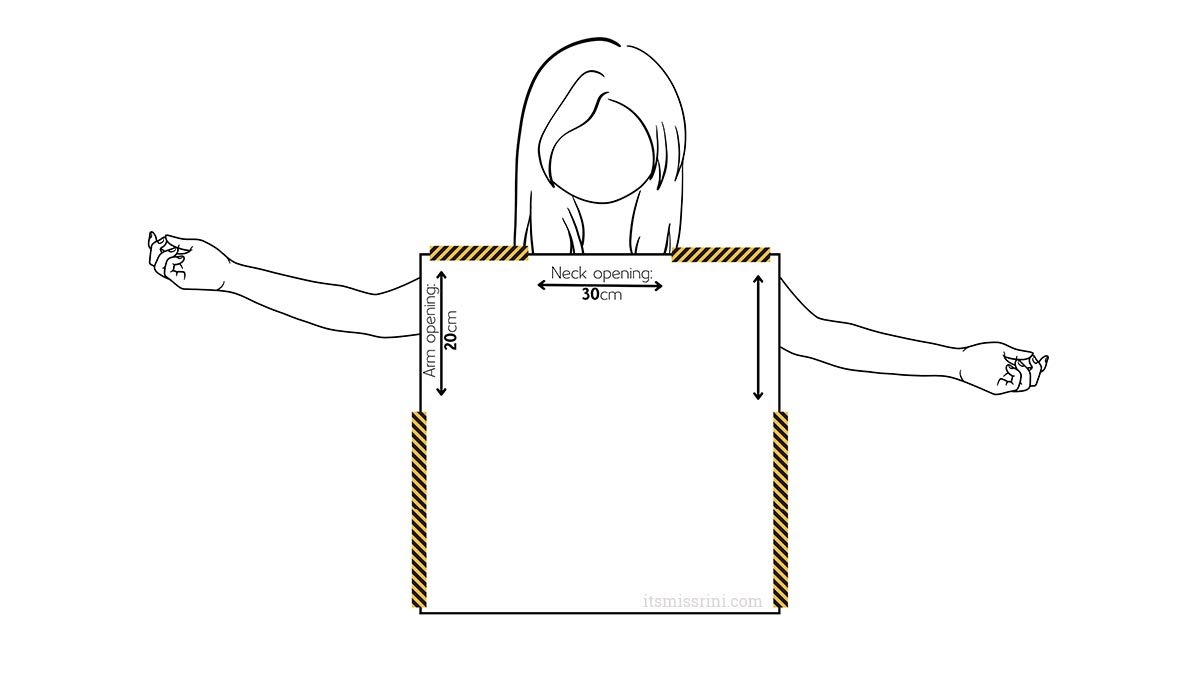
The yellow and black striped bars show where you’ll need to sew.
You can modify the length of each stitched section according to your personal preference and measurements. For example, I like to leave a little bit open at the end of the sleeves and the end of the torso as little slits. You could also just sew those all the way to the ends if you prefer. You might also want the neck opening to be larger or smaller, so just adjust the sewing segments on either side.
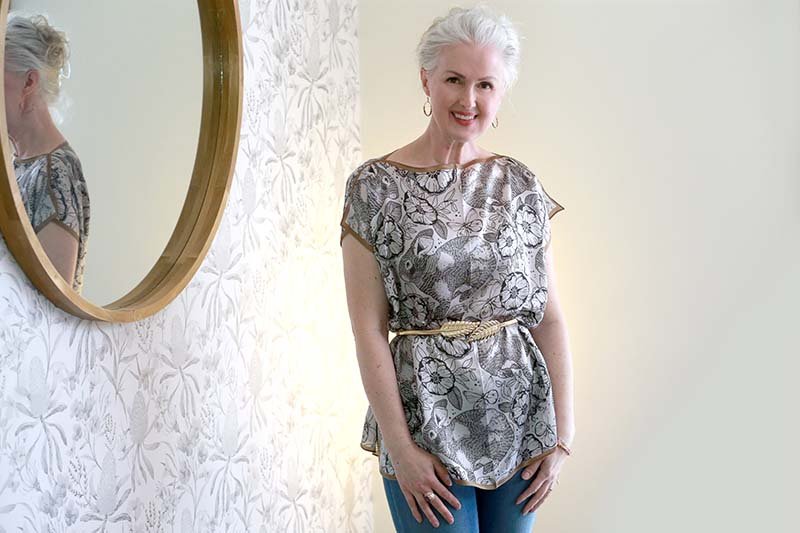
Once you’re finished, you’ll have a very simple tunic-style top that you can either leave out over fitted pants or jeans, or tuck in, or wear with a belt. I have some styling ideas on my YouTube channel if you’re interested.
Method 2
OK, this is using another scarf, but it’s different enough to the first method that I thought I should explain it in its own section.
This time, you’re only going to need ONE scarf but it needs to be rectangular and much bigger than the square one you just used. This is because we’re going to be folding it in half.
I came up with this method because I had a beautiful scarf that was just too big for me to wear as….well….a scarf! But I loved the pattern and the colours so much that I really wanted to wear it somehow.
The scarf I used for this measures: 120cm x 60cm. Yes, it’s quite big! I could have gotten away with much smaller, but I really wanted to use this scarf.
You can find suitable silk scarves for this method here:
21 x 67″ (53 x 170 cm) silk scarves
(so when you fold it, it will be 53 x 85cm)
21 x 70″ (53 x 170cm) silk scarves with more pattern choices
(Remember, you only need ONE scarf for this method.)
For this method, it’s just simple sewing again, but this time you will need to cut the fabric and sew the edges for the neck opening.
Here is the diagram:
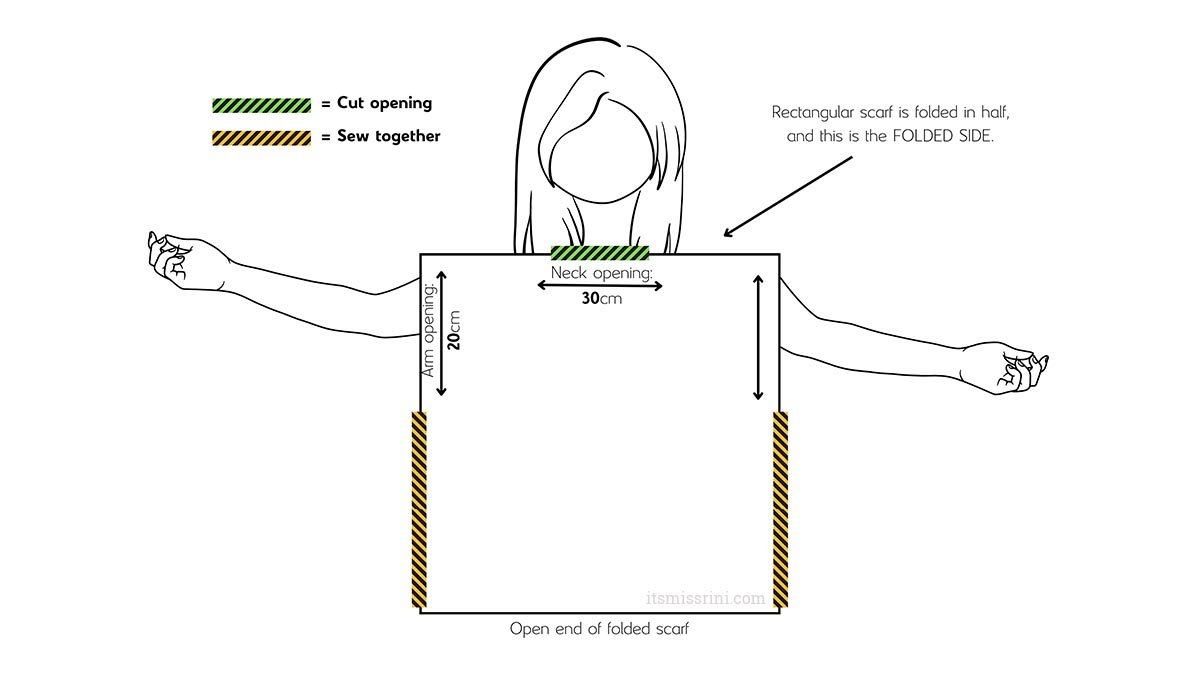
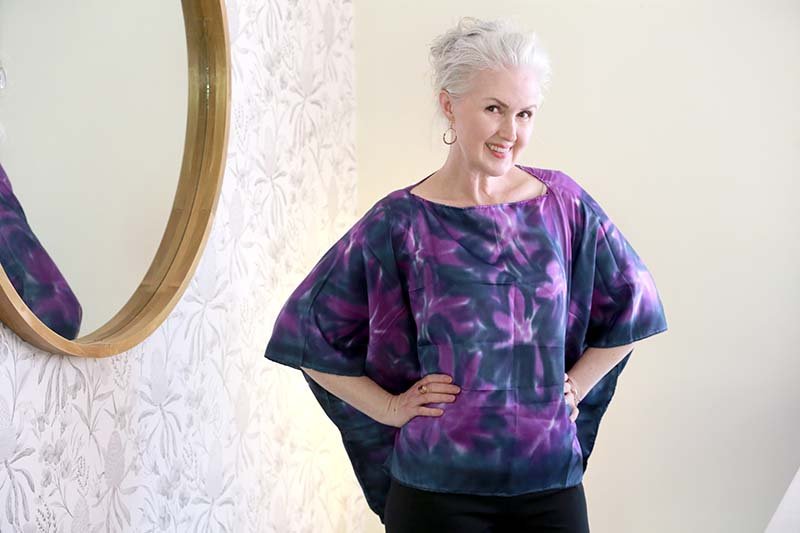
For me, this made a large, billowy top. I do love the folds of fabric in this and I think it really adds to the luxurious look of the top along with the rich purple and blue shades.
Method 3
You’re going to think this one is a little strange, but trust me, it works!
In this method we’re going to use……a pillowcase.
Yes, that’s right. I’ve been sleeping on silk pillowcases for a couple of decades now because I have naturally curly hair and I find I get less tangles on silk. It’s supposed to be good for your skin too, but I’m not going to make any claims there. So over time, I’ve accumulated a few silk pillowcases and some of them are just singles (ie, no matching pair). I use those for travel usually, but I thought I’d try the silk top method for one of them in particular just because I liked the colour.
You can use a standard pillowcase for a top to fit around 8 to 16. Or you can get a queen or king-sized silk pillowcase for a larger top. I recommend getting the envelope style, not the zipper style, but either will work (it’s just a bit more sewing).
Also, make sure you are getting a double-sided silk pillowcase (ie, not just one side silk).
Here are some lovely silk pillowcases that meet the criteria:
Envelope style – plain colours
More colour and size options here
More beautiful prints (even a mermaid one)
Envelope style with a classic neutral print (and a free scrunchie!)
This method is slightly more complicated and involved a bit of seam unpicking as well as some sewing.
Here is the diagram for this method using an envelope style pillowcase:
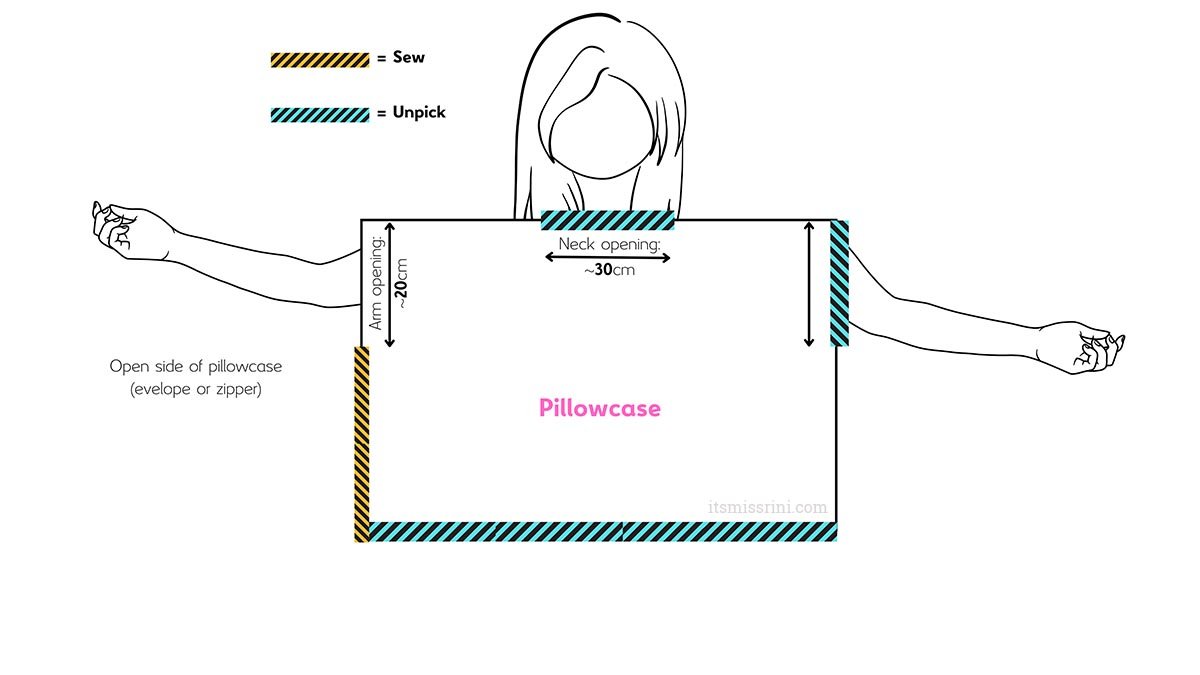
As you can see, it makes a simple squared top like the previous methods, except the sleeves will be longer and the top a bit shorter.
If you bought a zipper-style pillowcase then you will need to remove the zip and possibly just cut off that side of the pillowcase and re-hem. You could buy a slightly larger pillowcase to allow for that if you like.
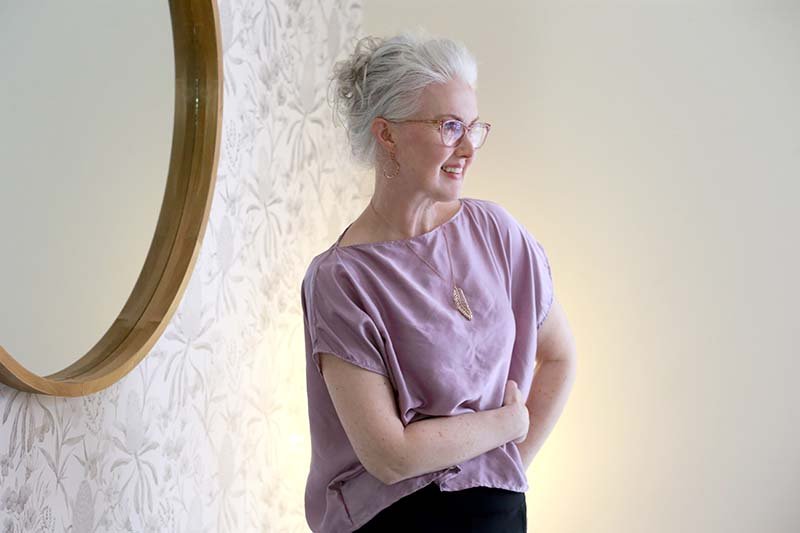
I really love the look of this top and like to wear it with tighter fitting pants or skirts.
So after trying these methods, did you save money? Well, yes! Even if you paid somebody to do the small amounts of sewing for you, I think you will come out on top. Let’s break it down:
Method 1:
2 x silk scarves: $75
Sewing cost: $20
Method 2:
One large silk scarf: $75
Sewing cost: $20
Method 3:
One standard silk pillowcase: $35
Sewing cost: $20
Now, I don’t know the going rate for your local seamstress, but mine charged $20 per job. Apparently it was very quick and simple, and she did them in very short time. You might also be able to do that part yourself, so take that cost off the total.
For these three silk tops then, it’s less than $100 per top. Plus, these tops are in the fabric of your choice and you can have beautiful prints. I tried to find some tops on my favourite silk website with a comparable amount of fabric and they were around $350 each.
You just saved $250 to $300 per top! That’s better than a half price sale!
You might have saved even more if you already had the silk items (or thrifted them) and you can sew them yourself.
So, what do you think? Are you going to give this a try? If you do, please tell me which method you liked best and I’d LOVE to see a photo of the finished result.
Thanks for reading and happy creating!
